Winter hiking in New Hampshire’s White Mountains can be brutal. With sub-zero temperatures and biting wind, it’s essential to be prepared. The clothing and gear needed for a winter hike can be confusing, but with a little guidance from this winter gear guide you can hit the trail fully prepared to deal with the elements on your day hikes.
CLOTHES:
Layering is the key for winter hiking. Chances are, you’ll encounter cold air and cold wind on your hike so you’ll need to be equipped to keep all parts of the body warm, at all times. Layering is important because hiking is, most of the time, highly aerobic, and you’ll generate lots of body heat. You will need to take off and put on garments throughout the day to keep a balanced body temperature.
BASE LAYER:
Your base layer should consist of lightweight moisture-wicking thermal underwear (top and bottoms). This layer is a hard worker, keeping you warm and dry, consistently battling with regulating your temperature and dealing with perspiration. I’ve tried many types of baselayers and prefer a wool based option such as Icebreaker.
MID LAYER:
Pick a synthetic or wool layer (non cotton) to keep warm. This layer should be breathable to allow moisture to escape. Nylon/polyester synthetic filled “sweaters” are a great lightweight choice.
OUTER LAYER:
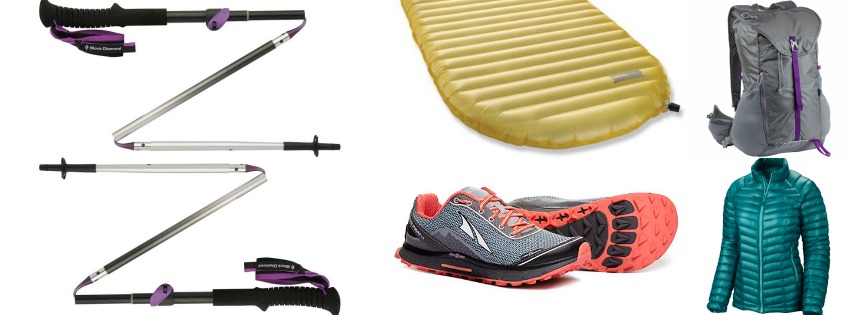
For the outer layer, it is important to have a wind and rain-proof jacket and pants to protect against wind, wet snow, and rain. For bottoms most people prefer pants they can zip of to keep cooler when needed (with long underwear underneath) like the North Face Paramount II Zipoff pants. I have been using windproof trail tights for the past couple years and really like this option. For an outer layer I like to bring my typical 3 season rain jacket in case there’s precipitation over my down jacket. With a synthetic jacket you don’t have to worry about keeping it dry and it tends to be cheaper, but often heavier.
GLOVES:
I recommend bringing two pairs of gloves (one being mittens) and glove liners for winter hikes. Generally, if the weather is mild, those liners will insulate your hands enough. If the weather is particularly cold cover the liners with a pair of windproof, waterproof, Goretex gloves/mittens. Waterproof mittens will do the best job of keeping your hands dry and warm.
SOCKS:
I recommend wool socks such as Smartwool worn with a pair of sock liners. Always bring an extra pair of wool socks. Never wear cotton socks!
GAITORS:
Knee-high gaiters keep the snow out of your boots and add an extra layer against wind and cold. A great budget friendly option are the EMS Spindrift Gaitors. If you want a pair that will last forever, invest in some Outdoor Research Crocodile Gaitors.
HAT:
Pick a synthetic or wool hat (no cotton) that covers your ears. You can also wear a hat and a headband.
BOOTS:
Summer boots/trail runners will not be enough to keep your feet warm in winter. Look for winter boots that are insulated- 400 grams or more (rated at least 20 degrees below zero). Look for boots with rubber bottoms and leather uppers. Make sure they are snowshoe and crampon compatible (stiff soles will work well). I’ve been using Salomon Toundra boots and even with my poor circulation, my feet have never felt cold in them!
TRACTION:
Depending on the hike be prepared to bring microspikes, snowshoes, or crampons. I keep light traction (such as microspikes) in my pack from November through April!
LIGHT TRACTION:
Yak Trax are not acceptable for hiking. Kahtoola Microspikes or Hillsound Trail Crampons work well. Hang them outside your pack with a carabiner or have a way to store them inside your pack.
SNOWSHOES:
Because you will be hiking up and down steep slopes, recreational snowshoes will not be beneficial. Your mountaineering snowshoes need to have toe and side crampons. Make sure you size them according to your weight PLUS the load you tend to carry. Heel lifts aren’t necessary, but they make going up steep sections easier. The most popular choices are MSR Lightning Ascents or Tubbs Mountaineer Snowshoes. Before you hit the trail, find a way to store these on the back or sides of your pack when not in use.
CRAMPONS:
Crampons will likely be the least used traction item but can be extremely beneficial on icy slopes. Make sure your crampons are steel and not made of aluminum. Look for 10 or 12 point crampons that fit onto your boots. Be sure to have a crampon bag to cover the spikes when storing them in your pack.
BACKPACK:
A 50-60 liter capacity backpack with options for strapping snowshoes and an ice axe will be idea for winter hikes. You’ll want a pack with plenty of external attachment points but avoid packs with too many external pockets or mesh features. The pockets can fill up with snow and the mesh is too fragile for these conditions. Two nice pack options in winter are the Osprey Exos 58 or the Gregory Deva 60.
FOOD AND WATER:
Water:
Bring a wide mouth Nalgene bottle. I do not recommend hydration bladders as they tend to freeze in winter. Get an insulated holder (that zips up) for your bottle and insert the bottle upside down. If the bottom freezes from air getting through the zipper it’s not the end you need to drink from. Adding Carry one outside your pack for easy access with the others inside your pack.
Food:
Bring food that does not require lots of preparation and will not freeze. In winter lunch breaks tend to be quick to avoid getting too cold. Make sure you have enough to stay properly fed throughout your trip. Keep some of your food in easy to access pockets. Pick snacks that are quick to eat and options that you crave. Instead of packing full lunch, bring items that are easy to eat on the go or during quick breaks.
OTHER GEAR:
SUNGLASSES/GOGGLES:
Look for 100% UVA and UVB protection. This is important to block the sunlight reflected onto the snow. Proper eye wear will also protect you from wind and branches. Sometimes a pair of sunglasses will suffice but other conditions require goggles to prevent windburn.
BALACLAVA:
A balaclava is a great option to keep your face protected from frostbite or windburn above treeline.
ICE AXE:
Many hikes don’t require an ice axe, but there are some incredibly steep and treacherous trails that do. If you carry one make sure you know how to properly use it. There are courses offered through AMC to understand how to self arrest properly. Have a way to attach it to your pack when not in use and cover the pick and spike for safety. Make sure you do not purchase or bring an ice climbing axe. You will need one specifically for mountain climbing.
ADDITIONAL ITEMS (Ten Essentials and more):
Make sure you have these items in your pack to keep you safe outside. While the items may vary depending on the conditions, goal for the day or personal preference, these items are worth looking into. Some are a necessity while others are just nice to bring along.
Head lamp with spare batteries. Electronics die quickly in cold weather. Bring some spare batteries in case you get caught on the trail later than planned.
Bandana. Good to wipe your nose, but it can also serve many purposes including cleaning foggy goggles, pre-filter water, or provide additional neck protection.
Plastic whistle. Don’t rely on the built in whistle on your pack. Make sure you buy a plastic whistle. Metal ones will freeze in the winter.
hand and foot chemical warmers. I like to keep a couple in my car in case you forget to replenish your supply.
map and compass. Make sure you know how to use these tools properly.
mechanical pencil and paper (pens can freeze)
matches/fire starter
emergency shelter. An emergency bivvy is great to keep in your pack all year round in case of an emergency.
foam pad to sit on during breaks. This will prevent your body temperature from lowering as quick. The pad can help you in an emergency situation.
toiletries
trekking poles. Great for helping you go downhill and over partially frozen stream crossings. Make sure your poles are compatible with snowbaskets.
camera. Don’t forget to document your winter adventures! Make sure you have a good case to keep your camera warm and dry.
nylon cord (50’). I’ve never had to break it out, but it’s a great safety item to have.
Delorme InReach- Give your family some peace of mind while you’re out there.
Looking for even more information before you hit the trails? Learn some of my best tips to keep warm on a winter hike.
Last modified: September 1, 2017